When Dan and I entertain, we always divvy up the duties. He cooks, since about all I can make is microwave popcorn. And I dress up the table, which is one of my all-time favorite things to do in the world. While I love coming up with creative place settings, doing the centerpiece is my favorite part.
Whether it’s a simple arrangement that will grace your dining table year round or a more elaborate display for a special dinner party, creating a memorable centerpiece is fun and easy. I asked Nell Hill’s visual team members Becky and Marsee to show us how.
First, Set the Table
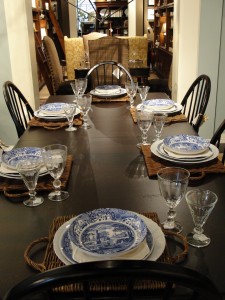
Before I even start on the centerpiece, I always set the table first so I know exactly how much space I have left over for the centerpiece. In the past, I used to create the centerpiece first, but on more than a few occasions, I got so carried away there was no room left on the table for the plates. I’ve learned my lesson, and now I get the essentials in place first. Then, every inch left over is fair game!
For today’s example, Becky and Marsee went with a decidedly summer look for the table. Instead of using a heavy tablecloth, they let the cool, clear table top show through. In the summer I also like to use about a yard and a half of fabric, either hemmed or folded under and pressed, as a table topper. We have so many amazing and affordable fabrics at Nell Hill’s Briarcliff, you can pick out an assortment to use as table toppers so you can easily change out the look of your table for each season and occasion.
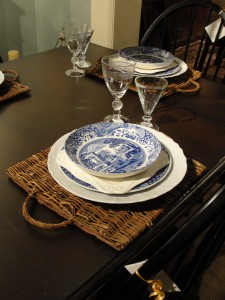
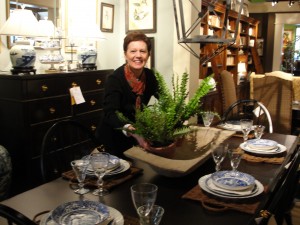
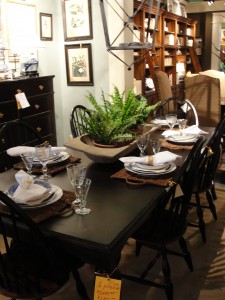
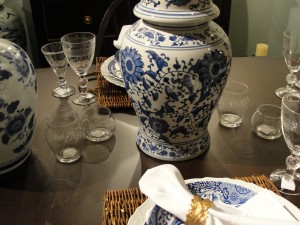
The visual team started each place setting on a simple wicker tray, available at Nell Hill’s Online. Then they layered it up with the blue and white Spode transferware I got at market for a steal. They added simple clear glass goblets and white linen napkins to round out the look. With this beautiful base, they’re ready to finish off the table with a wonderful centerpiece.
Then, Pick Your Look
The beauty of centerpieces is that they can be as simple or elaborate as you want, depending upon your time and tastes and the occasion. Today, we’re going to show you two treatments – one that’s stylish in its pure simplicity, the other a bit more elaborate and sophisticated.
Look One: Simple and Sleek
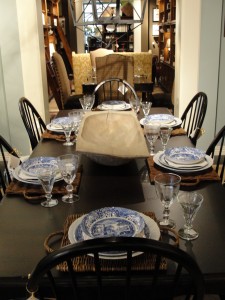
Start your streamlined centerpiece with an interesting container of some kind. Becky and Marsee chose an antique wooden dough bowl. I decorate a lot with wooden dough bowls because they add rustic texture to dining table displays—I love them paired with fine china and silver. They are also incredibly versatile tools you can use over and again in your seasonal decorating. They look wonderful filled with seasonal foliage, sitting at a table’s center, on a buffet, above an armoire or on a ledge.
Instead of a wooden dough bowl, you could also use an English foot bath, cachepot, basket or antique wooden box.
Next, fill the container with something fun, interesting or colorful. Marsee is fitting our wooden dough bowl with several faux potted ferns. These little guys are one of my favorite accents to use in summer decorating. But you could also use moss balls, wicker balls, green apples, forced bulbs—you name it.
If you want a fast and easy centerpiece that looks lovely, you’re done! This simple arrangement is perfect for a casual dinner party or as a standing display you can leave up year round.
Look Two: Sophisticated Elegance
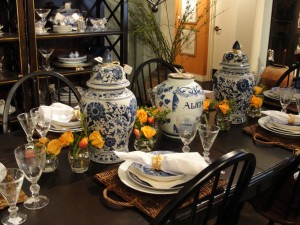
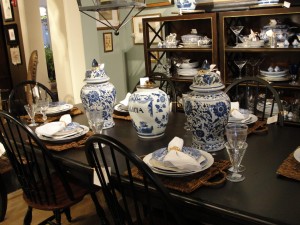
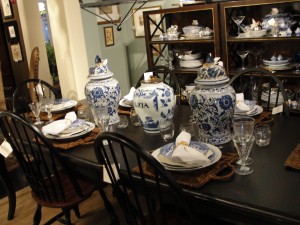
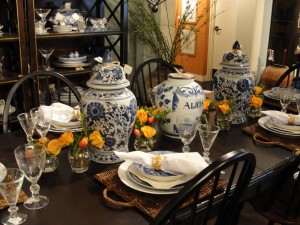
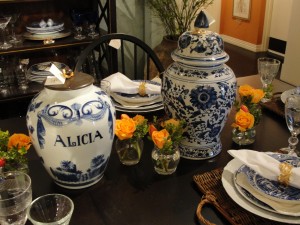
To create a centerpiece that’s a bit more elegant and elaborate, start by picking out a few statement pieces that will serve as the base of your display. You’ll want pieces with some heft and intrigue. For our sample centerpiece, Marsee and Becky selected two blue and white Asian ginger jars to complement the dishes in our place setting. These ginger jars are one of my go-to decorating tools right now because they are so affordable (just $22 each!) and can be used in a million ways in your home.
Four our third statement piece, the team added a wonderful china jar. I like how they paired this costlier piece with the inexpensive ginger jars, following the Nell Hill’s principle of mixing the everyday with the precious.
Notice that they used three statement pieces, following the design principle of using an odd number of pieces in your displays to create visual intrigue.
For the next layer, the visual team added clusters of clear glass jars. These little cuties work perfectly as votive holders or vases. You could also fill them with a treat, like candy, to give to guests as party favors. Check them out at Nell Hill’s Online – they’re a great price. Instead of the jars, another option for this table would be to tuck in small glass or pottery vases.
To finish the look, the team filled the jars with adorable bouquets of fresh flowers. I often use fresh flowers when I entertain, weaving little bouquets into my existing tableaux, because their presence alone makes an occasion feel special.
Because orange is one of the hottest colors this season, Becky and Marsee picked up inexpensive cash-and-carry bouquets of orange tulips and roses. To fill out the bouquets, they tucked in boxwood twigs snipped from Marsee’s garden. I’m a huge fan of pairing orange accents with blue and white china. For instance, in the fall, I set my table with blue and white transferware then add in displays filled with bittersweet, pumpkins and orange gourds.
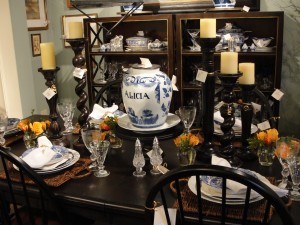
Just for fun, Becky and Marsee pulled together a second version of a more elaborate centerpiece to show you some other ways you could dress up the blue and white table. They placed a black wooden cake plate at the table’s center to elevate the lidded jar, resting the jar upon a white plate for contrast. Then they brought in an assortment of chunky mahogany pillar candlesticks in a variety of shapes and sizes. (Anyone recognize these from last week’s blog on how to decorate your mantel? Shows how versatile these great candlesticks are!) The visual team then finished off the look with the same flower-filled glass jars they used in the first centerpiece. I can’t decide which look I like best – they are both so fresh, fun and interesting.
Next Week …
Stumped by how to style your buffet? Next week, we’ll show you how to create a light and lovely look for summer that you can easily change up for each season. Come check it out!

