I love big, grand Christmas trees. But in my snug little cottage, we just don’t have the room. So this year, I’m trying something different. To get the illusion of a large tree, I’m putting a 5-foot tree into a garden urn (our favorite tree stand at Nell Hill’s), then hoisting it up onto the desk that sits behind the sofa in our living room. We won’t have much room for gifts underneath, but that’s ok. The stacks of presents we buy this year will all be under my granddaughter Maeve’s Christmas tree.

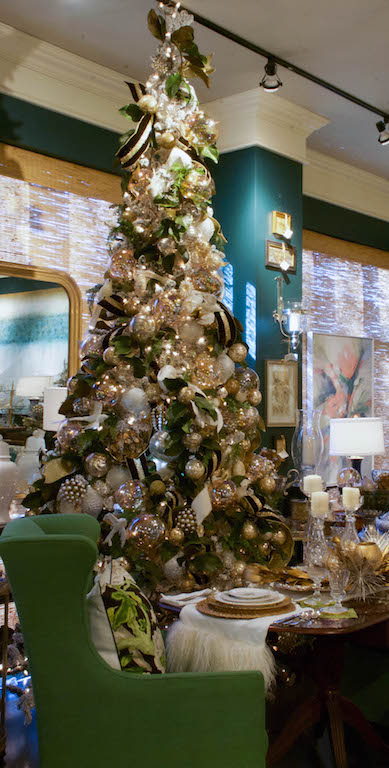
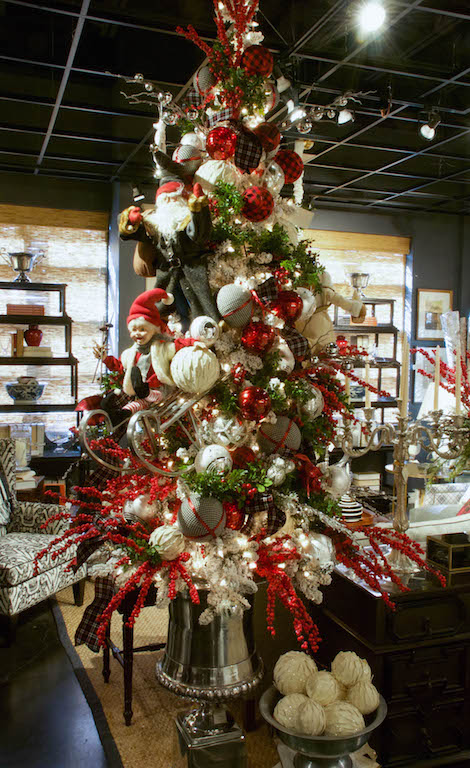
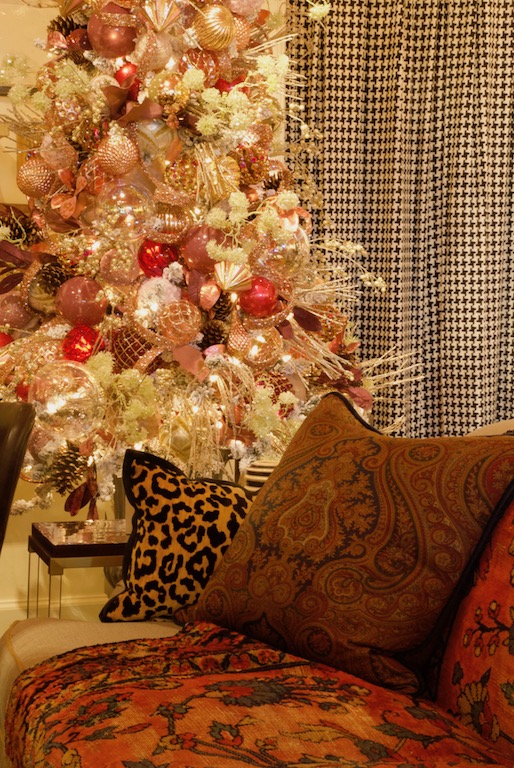
At Nell Hill’s, we go all out when it comes to trimming our Christmas trees. Every year brings a new opportunity for us to reinvent this classic, using different techniques, colors and themes. This year, our bliss is trees that are so richly festooned with ornaments that they look like jewelry. The towering, slender trees we are partial to at the store allow us to gain maximum visual impact using minimum floor space.
When it comes to decorating trees for the holidays, no one compares with Bev, who designs all our trees at Nell Hill’s. If you’ve ever been to Nell Hill’s, you’ve likely seen Bev up on a ladder, wiring greenery or ornaments, covered in a light dusting of glitter. Our customers ask us all the time for tips on how to decorate a Christmas tree, so I asked Bev to share her secrets:
1. Place the tree in an interesting holder.
We put our Christmas trees in large garden urns. When the trunk is wedged down in the water drainage hole, and the bottom branches are folded over the top of the urn, the tree stays in place very nicely. (At Nell Hill’s, we also wire our trees to the ceiling as an added safety precaution since there is so much foot traffic around them.)
2. Start with lots of lights.
The rule of thumb is to use 100 lights per foot of tree. Bev suggests replacing your light strands every year so you don’t have to worry about old lights burning out before the season is over. For a truly luminous tree, wrap each branch in lights. Start at the base of the branch, wind the strand up to the tip, then go straight back to the trunk, and repeat on the next branch.
3. Add branches and picks.
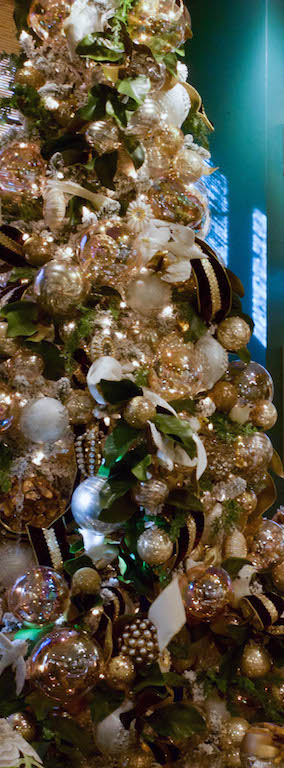
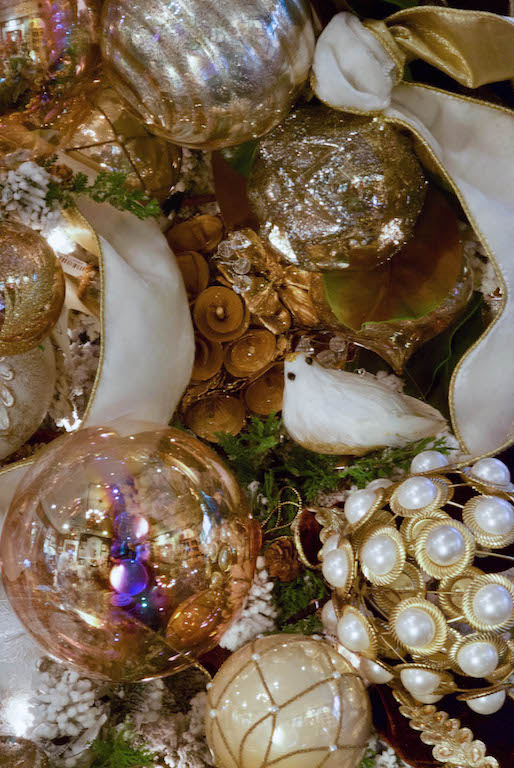
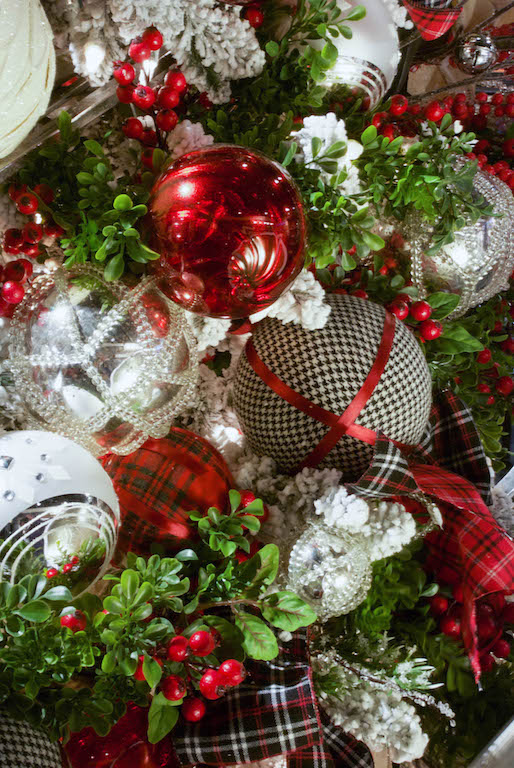
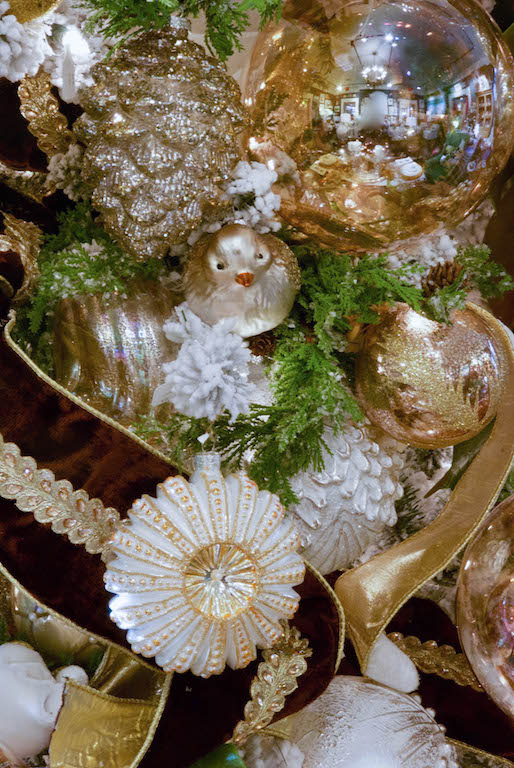
Inserting faux greenery branches and picks, like magnolia blooms or holly berries, will make your tree fuller and give it more dimension. Sometimes, Bev allows a pick or branch to extend outside of the cone of the tree just a bit. Secure them in place with zip ties.
4. Pick a powerful focal point.
At Nell Hill’s, we like to add a show stealer or two to each of our trees. These are usually large ornaments or even novelty items like an old fashioned sled, a pair of vintage ice skates or antique skis. On our trees this year, we are using snow covered villages and oversized snowflakes. Be sure to secure the larger décor well so it doesn’t come crashing down. We use lots of zip ties and wires on our trees to hold the big items in place.
5. Mix the size of the ornaments.
Bev recommends separating all your ornaments into three piles: small, medium and large. Hang the large ones first, securing them toward the back of the branch, where they will serve as a backdrop. Next, add the medium ornaments at the center of the branches, then the small ornaments close to the tip of the branches. For a fully loaded tree, like those at Nell Hill’s this year, hang lots of layers of ornaments, some on top of the others. Bev recommends using a mix of ornaments in different sizes, shapes and colors. She also prefers the ornaments be hung snug against the branch instead of dangling down below, so she fastens them in place with zip ties, sometimes clustering two or three together with the same tie.
6. Tuck in ribbon.
Bev finishes our trees with twists of holiday ribbon. This year, she is looping the ribbon into loose knots, then dotting them in here and there, starting at the bottom of the tree and working up. She never, ever winds the ribbon round and round the tree.
7. Take a final look.
When you are done with your tree, step back and give it a critical look. What does it need?
8. Enjoy!
Your last step? Pour yourself a hot cocoa, dim the lights, snuggle into the sofa and bask in the warm light of your masterpiece!
Next Week … More holiday decorating tips and tricks.